Bike Stand Update

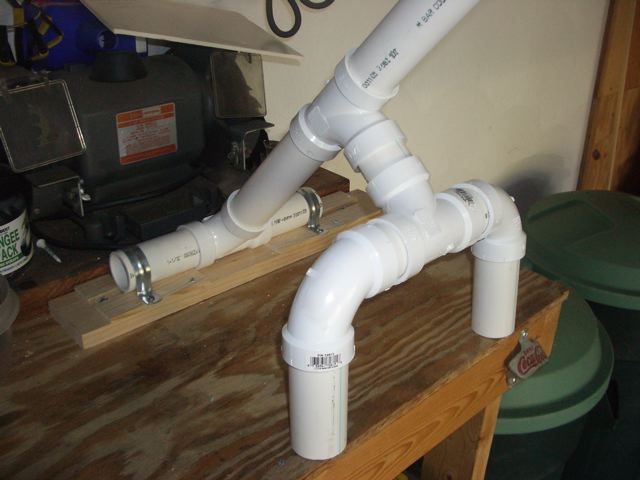
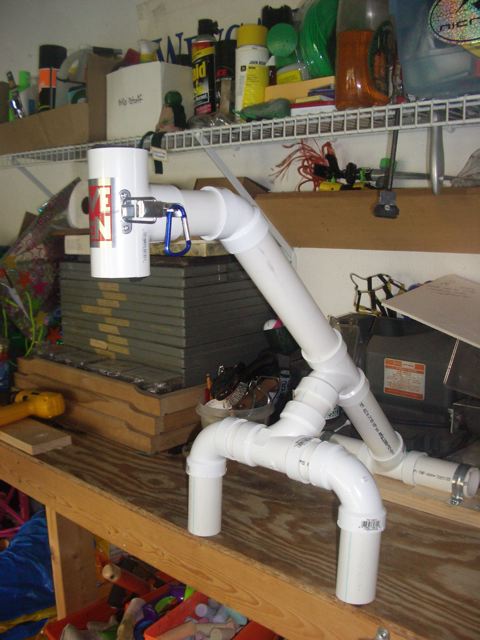
As promised, here are pictures of the completed PVC bike stand. I modified the original plans found on Instructables somewhat to both reduce parts and hopefully increase the strength (I’m not an engineer). I simply lengthened the front legs and did away with a 45 degree elbow and small length of pipe.
 I also decided to mount the rear of the stand to a plank that I could fasten down to my garage workbench with wing nuts. This way I can easily get it out of the way if I need to work on another project. Obviously with the weight of the bike there is no need to secure the front legs.
Most of the PVC was purchased from Home Depot. It is very difficult to find 1.25-inch PVC as Instructables suggests, so I went with 1.5-inch. I also got really luck with the clamp, the tee fit so snugly in my Stanely 20-112 Clamping Mitre Box that I could cut it in half damn near perfect. I left it in there to attach the hinges as well as the clasp.
The clasps were found at an ACE Hardware store, I use a little toy ‘biner to clip through it, in the unlikely event it comes open when I’m cranking down on something. If you like tinkering with your bike and don’t have a work stand give this project a shot, it’s very simple.
Posted by: Lawrence

Your stand looks really nice, I used it as inspiration and a blueprint to build one of my own. I especially liked your idea to remove the elbow. Your site is informative and a pleasure to read.
I just came across this and thought I would add what I thought about the project:
I for one just got into mountain biking, so I need a stand. I am going to follow this a guideline, but there are somethings that I am goign to change.
For one, that main junction where that T has the most stress (the one in the middle of the down pipe in the rear), I plan on moving that up further than you have it. Then I will shorten the post going into the seat post clamp. Then to compensate for the main T being moved up, the front legs (the ones that aren’t attached to the wood), will just be a little long.
I am going to do all of these modifications just so that I can have a stand that isnt going to sag, twist, or bend when I attach bikes to it. I am not trying to steal your spot light, I am just trying to explain my thoughts so that others can improve on your design.
Steve those are good mods. It’s good to experiment with the design (as I did from the original Instructable version). I haven’t had any sagging or twisting, but the one thing I wish I did was make the horizontal piece coming from the back of the clamp to the elbow coupling slightly longer so my pedals could clear the table a little more than they currently do.
Good luck with your stand, post a link to the finished product!