Alaia Surfboard Project – Post 3

Alaia Wooden Surfboard project: Post 1 | Post 2 | Post 3 | Post 4 | Post 5 | Post 6 | Post 6b | Post 7 | Post 8 Finis
 Significant progress this weekend with the Alaia project. I cut the board to shape with a jigsaw, working in one direction. I said in the previous post that I wouldn’t cut the Stuth tail, but I had a change of heart. I like the side-cut it creates and given my 24 years of snowboarding I’m drawn to that shape (yeah, I’m that old and have boarded that long!).
Because the board needed to be clamped and un-clamped (3 times) I made cuts on either side of the board, with 90° cuts to remove material as I progressed. After the jigsaw work was done I used my belt sander to fine-tune the edges to get a uniform ~3mm distance from Jon’s marks (as explained in post 2).
 Once I was satisfied with the shape, I used a pocket plane to put a 1/4″ bevel on the top edge (you can apply very light pressure since the Paulownia wood is so soft). Holding the plane at 45° and moving in one direction, I cut until Jon’s marks were no longer visible. After inspecting and small tweaks I flipped the board and transferred the center line which I’ll use to create the concave. I also transferred 3 perpendicular markings from the top of the board at 12″, 40.5″ and 70″ from the nose. I believe these marks were used to create the shape, but it can’t hurt to have them on the bottom.
![]() Next I’ll work on the hardest part, the concave. Jon told me the concave should start about a third of the way down the board and Tom gave me some advice on how wide.
Next I’ll work on the hardest part, the concave. Jon told me the concave should start about a third of the way down the board and Tom gave me some advice on how wide.
The board currently measures 7′ x 17 1/2″ x 3/4″. After the concave I’ll start sanding the entire board from coarse to fine grit, getting it as smooth as possible. After that I’ll oil (linseed) over the course of several days. I’ll apply 3-4 times and before each application I’ll do some light sanding to make it as slick as possible! 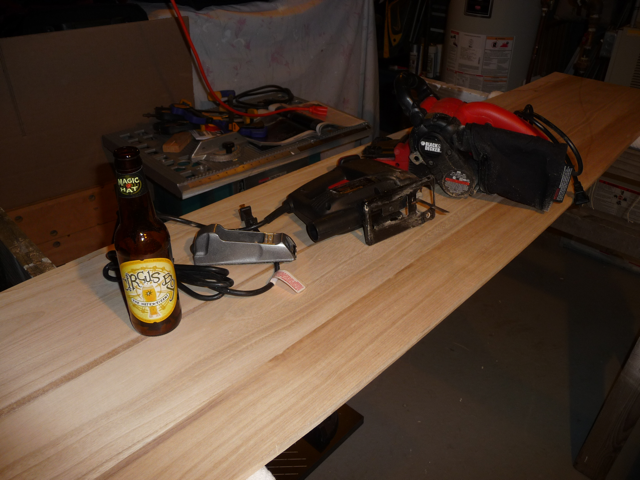 These are the tools I used for this phase (a special thank you to Circus Boy, for without it, none of this would have been possible).
As always, check back for pictures and updates. Please also post your comments and advice. I’d really like to know if anyone else has worked on shaping their own wooden boards or intends to try.
Posted by: Lawrence
Hi, I live in Uruguay and would start to shape an Alaia, please let me know when you post new photos and commentary of your work, until now is very util for me.
Here is very dificult to find Paulownia and balsa wood, Do you think that Cedar is to heavy to make the board?
Keep surfing
Marcos
Hi Marcos, I will let you know. I’m hoping to work on the concave tonight (assuming no more snow to shovel here in the US Northeast!) and will email you after I post an update.
Thanks for reading and commenting. I hope you find the information useful.
Cheers,
Lawrence
Hey Larry… as the friend who went in with you for the other Alaia, and who is just finally starting to work on his tonight, I have some questions:
1. I am making the Finley, so maybe we can do a “board swap” sometime to see what the other cut feels like…?
2. Why are you going with a sharper bottom on the rails? What are the factors that go into deciding the shape of the rails?
Absolutely we can board swap. The edge is sharper on the bottom because that’s what’s holding you onto the wave! I started the concave with the belt sander and got a little nervous so started hand sanding. I need to hit the Depot tomorrow to get some more paper (different grits), but hope to have a good portion of it done this weekend.
Let is know how you’re progressing and maybe link some pics. Good luck!
Hi Lawwence
I am planning to shape my own Alaia.. Have been following your blog..
I am drawing up some elipse parabolas using a drawing vector program. Creating my own template.
As a guide do you think you could take a few measurements of the widths, say from the nose to tail every 12 inches and post these up?
With this data I can create and tweak up a great shape.
Hamish
Hi Hamish, starting from the nose and every foot down to the tail (7′ total) the measurements are…
15-1/4
17-3/8
17-1/2
17
16
14-3/4
14-1/2
I have the Stuth tail – the tail typically seen with the Finley (http://www.wegenersurfboards.com/alaias.html) measures 12-1/2 (if you want that tail replace the last measurement of 14-1/2 with 12-1/2.
Good luck and let us see some links to pictures when you get started!
Thanks heaps.. I am in Melbourne and Im off now to port phillip a paulownia supplier. Most likely the source of your wegener blank.
I will Template and send through the links..
Thanks again..
H
Hey Lawrence!
I’m a surfer from Santa Cruz, CA and I’ve been following your blogs. I was wondering if the blanks you use for your alaia boards are solid pieces of paulownia or if they are several pieces that have been glued together? Also, what type of rails did you use on your 7′ alaia? Thanks!
Hi Brian,
I purchased the blanks from Jon Wegener in California. Both Jon and his brother ae super friendly and the quality of the blanks superb. I plan on making another board, the firs one took about 12 hours of labor.
You can check out http://www.tomwegenersurfboards.com/html/news.html
“The blanks are made of the harder species of paulownia which is best for thin alaias. The lengths are glued together by tong and groove and will not come apart in salt water. The sheets are 19 to 20 mm thick, 17 and a half inches wide and up to 7ft 11 inches long.”
“For all USA inquiries please contact Jon Wegener at jswegener@hotmail.com Also, please check out Jon’s updated website http://www.wegenersurfboards.com”
Good luck Brian, please let us know if you take this on and share the results!
Brgds,
Lawrence
Thanks for the info! I’ll check them out and I’ll let you know how things go. Thanks! Brian.
Hello Lawrence and thank you for your great blog. I purchased a blank and I’m nearly done with the hand saw job. Now I will begin to work on the rail. Could you please let me know what king of rail did you chosem and how to do it at the same time !!!. I have a stuth model.
You can answer me on my personal email or on the blow as you prefer. Your help is greatly appreciated. Thank you again.
Hi Paul, That’s awesome you bought a blank, the project is a lot of fun and I’m sure the rest of the ride will be too…
The rail is rounded on top and sharp on the bottom. For the top I used a hand plane to make a 45° bevel about 3mm wide and then made 2 more passes to knock those edges off and then sanded it smooth. Also the top as some very slight roll to it (convex).
I used a belt sander to shape the bottom, by sanding down about 3-4″ in from the edge and taking off more on the outer edge. The best way to see this to look at Rasta’s board in the first post – only don’t go that severe (I didn’t but may take off more as I get a feel for the board). REMEMBER YOU CAN ALWAYS TAKE OFF, BUT NOT ADD BACK ON!
I’m not sure how it works yet, but the water is a toasty 39° F and the air temp should reach 50° F this weekend so I’ll likely give it a whirl. Thanks for your post and let us know how you progress.
Hi Lawrence and thank you for your kind answer, I have a few more question if you would have a few minutes :
1) The mark (template) that Tom draw on the blank : is it the begining of the rail or the end of the rail (shoud you begin the 45 degree angle from the mark or end it at the mark) ?
2) Should the rail be shaped the same all the way trough the nose to the tail ?
I thank you again for your help !!
OH ! and I forgot =
3) How large are the rails from the begining of the rail to the end.
(From the point where you begin to shape the 45 degree angle)
Hi Paul,
I started the bevel about 3mm from the mark – removing material at a 45° angle until I came up to the mark. I did this all around the nose and down the sides to the tail (on the top of the board).
I’m not sure about corner radius, but it sorts itself out when you cut the bevel as explained (I used a hand plane) and then sad it round. On the bottom keep it as knifey as possible.
Good luck!