Alaia Surfboard Project – Post 5

Alaia Wooden Surfboard project: Post 1 | Post 2 | Post 3 | Post 4 | Post 5 | Post 6 | Post 6b | Post 7 | Post 8 Finis
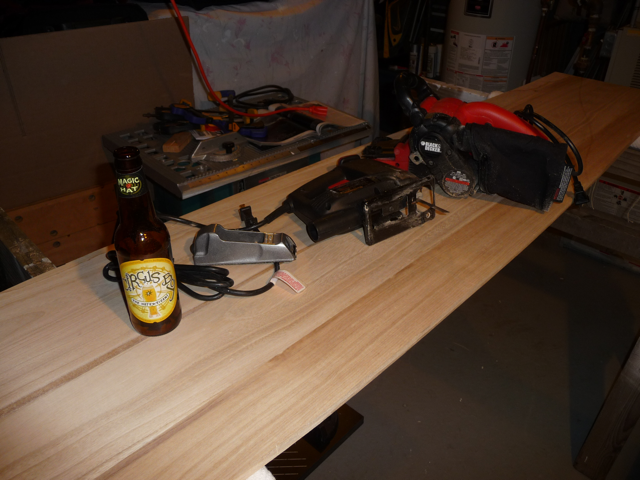
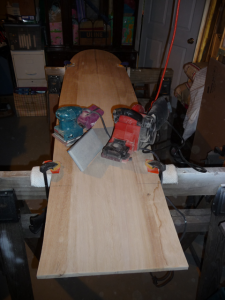
They say a picture is worth a thousand words. In this case I think the words better do the talking because it’s difficult to capture the progress made with the concave in a photo. I haphazardly arrived at a method for creating the concave and it goes like this…

- Snap center-line (nose to tail) with chalk
- With the belt sander on the center-line at shallow angle, I quickly and carefully sand in one direction
- With hand sander, I work from and apply pressure to the center and work outwards
- I sand a length of about 18″ at a time, using 12 strokes near the center, 6 a little further out and 3 near the edge
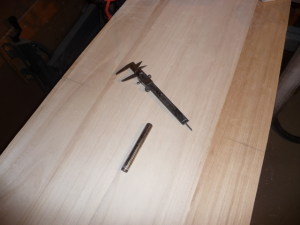
… I repeat this process over and over, each time making the concave deeper and feathering out toward the edges a little more. Reestablishing the center line helps keep the deepest point consistent. I happened to have a weighted metal rod I used to use when tuning skis. I place this rod on the top of the concave on one side let it roll up the other side of the concave and eventually settle in the center of the board (if it doesn’t I sand more). I included a picture of the rod as well a some calipers I’ll use when shaping the rails.

The hand sanding helps refines the work done with the belt sander. I felt a little out of control with the belt sander, but found the results more predictable when working quickly (not letting it bite too much in one place). I tried using the palm sander and it did a nice job, but the dust got out of control. It if wasn’t winter I’d be working on this project in the garage, but I’m in my workshop – which is also the boiler room , where I need to keep dust to a minimum.
The process is taking longer than anticipated, but I’m happy with the results so far. Punxsutawney Phil says 6 more weeks of winter anyway, so I’ve got nothing but time. I’ll keep working on the concave using the methods described above and start the next post on the Alaia project with the overall sanding and Linseed oiling.
Posted by: Lawrence

Hi Lawrence been watching your progress and have started my own alaia the bottom concave channel I found an easy way to set up my plunge router and fence to the centre of the board (after planing the edges straight and true ) for the deepest cut of 1/4″ in the centre and resetting the fence the router bit shallower each cu until I had a a stepped channel then simply used the belt sander to smooth then accuraate sand with the palm sander I have made lots of jarrah deck long skateboards all kinds of surfboard shapes for mates so I am a little more proficient with my tools.
About to linseed it now so I’ll send you a pic whenn she’s done Total tool time 5 hours marking out time 3hrs Joel
Hey Lawrence,
Great post.
I saw someone riding an alaia at Rincon the other day and now i’m hooked! I am ready to make one myself. Your post is super helpful, when I get mine started I’ll let you know how it goes. I’m in Santa Barbara, do you know of any good Paulonia dealers in the area? I’ve contacted Jon Wegener but have not heard back from him yet. (is he in Los Angeles?)
Thanks again for the post, keep up the good work!
alex
took my board (7’11″x 18″x 17″tail) for a ride today a bit blown out but around shoulder height Got up a few times and found I had to stay really crouched and hold the rail in but WOW it was fast ( few cool tail slides too not intentional though) I had a bit of trouble with getting a bit of wax to stick to the deck so footing was definately a problem for me in this instance I might give her a sand back again tonight on the deck and not reoil the the top and try to wax it then. It was fun and you will see any imperfections in your sanding after its first session in the water.
PS I had a lot of strange looks from other surfers at Trigg (Perth Western Autralia)
Thanks for the post Joel! That sounded really fun. Good point about the deck not taking wax with too much oil (or any at all) – I’ll need to consider that. It’s winter here now and I was snowboarding last week – will start to focus on the Alaia again now that I’m back home.
If you have any pictures please post a link. Thanks again!
Hi Lawrence
Great Blog. I am in durban , South africa and have been reading alot about the Alaia boards that Tom Wegener has been making. We don’t get the same type of wood in south africa as you are using, so i was wondering a few things….
How heavy is the finished product ( i need to find a substitute )
I am really keen to find a template for a shorter board, do you know anyone that has posted any?
thanks and keep up the great work
I’m close to finished – I sanded quite a bit today and haver to say I’m really pleased. Sanding the concave took a lot longer than planned but I was snowboarding, got sick, kids, work travel, etc – or maybe I just don;t want the project to end?! I’ll weight the board and let you know. It’s fairly light though, Paulownia wood is denser than Balsa, but still considerably light.
I will probably post all the URLs I found for the Alaia – not sure of any with templates, but let us know what length you’re looking for and I’m sure we can figure out the math.
Thanks for the comment and post your progress on bitness.com. Anyone with pictures, you can send them to lzevon@bitness.com and I’ll be sure to post them.
Hi again and you for your great blog…
You helped me already shaping the rails I did it !.
Now I will shape the concave. If you have a few minutes to help, please tell me :
1) You did a single concave or single to double ?
2) from where should the concave begin (from the nose of the board) ?
3) How deep should it be maximum ? (my alaia is 3/4 thick)
4) do you belt and hand sand from nose to tail orfrom rail to rail ?
5) would you have any drawing, this would help me a lot !
I thank you one more time for your help !
Hi Paul,
Glad to hear the rails are all set. It’s a single concave that should start about a third of the way down from the nose (28 inches for my 7 foot blank). I went with a belt sander first, applying pressure to the inside of the belt (over the middle of the board) and moving from head to tail – with the grain.
Essentially what I did was create a V working the concave from one side to the next and testing dead center with a weighted piece or steel rod. Don’t go too deep off the bat because you probably want to surf the board to get a feel for how you want it. You can always take off more material if you don’t think the concave is deep enough.
Check out the previous post (http://bitness.com/?p=433) for more on the concave. Also have a look at Rasta’s board. It’s an exaggeration (for you and I) of what you want, but it loosely resembles a bat shape.
i got a spruce plank from lowes hardware,6ft by 16 in by 3/4 thick=$20.00, i used a spin template i made when i shaped a foam board for the nose and brought the width in an inch on each side for the back half..i left the rails pretty sharp on the bottom for 2/3 and kind of knife edged the whole nose tapering it about equal from the bottom and top..no plans to concave it yet, want to ride it flat first, then i will see…thought about varnishing it or teak oiling it, any input? thinking about a logo and maybe a tail block for strength…..later
Yeah for spruce maybe you think about some varnish. I used Paulownia wood which doesn’t soak-in water and is sustainable (I’ve read it can grow up to 20 feet the first year). For my board some boiled linseed oil was all I used.
I used little concave to start, but I had some. I too subscribe to your notion that you can always take away material to get it just right, so do it in steps.
Good luck!
Hi guys, Great Blog. I recently completed my first alaia. A few things that I learnt along the way were:
1. for the first two coats of linseed oil mix it at a ratio of about 50/50 with natural turpentine(raw turpentine)This assists the oil to penetrate deep into the timber and will help prolong the life of the board. Then add a coat of pure linseed oil.
2. As a few people have mentioned take less off initially and come back to refine after surfing a few times. I’ve made about 3 or 4 changes to mine.
Has anyone tried putting a bit of v(convex) in the nose to minimise the board spinning on takeoff. It could just be a problem I’m having but I’m finding that the board spins just as I’m getting on to a wave. I have limited nose lift due to the initial thickness of the paulownia so this may explain it. Any ideas would be appreciated
Hey Chris, great to hear about the Alaia! I’ve not tried any convex in the nose but in theory it sounds like it might work. With my Alaia I’ve made a few small modifications. The initial build had enough material on it to allow me to experiment as I went along. I think that’s good practice – you can always take a little off but not put it back. Post a link to your board and thanks for the comment.