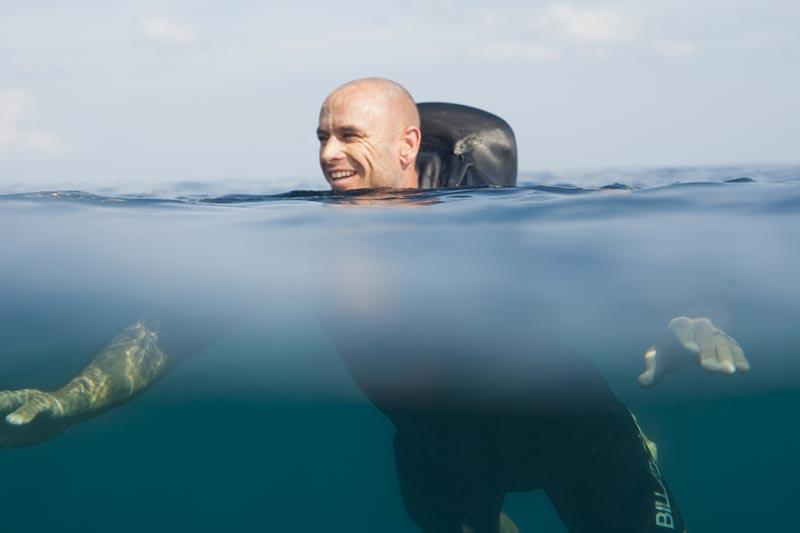
Billabong has introduced a new wetsuit that incorporates a self-inflating bladder from a CO2 cartridge. The Billabong V1 wetsuit allows the surfer to pull a cord on the front of their wetsuit, thereby inflating a back bladder and taking him or her quickly to to the surface.
In tests and one real-world example, Shane Dorian claims the V1 took him quickly to the surface and subsequent white water from other waves merely rolled under him. That’s pretty cool stuff and certainly a welcome precaution to Shane and other big wave chargers. [See video below]
Billabong, if I may?
Normally when I see products like this I think “Why didn’t I think of that”- but truth be told I have thought of this one and I guess more than anything I’m surprised it’s taken so long. If I could offer any advice to the product designers, I’d say consider cords on both sides of the suit in the event of a broken arm. Also, if the rider is held under at depth for more than X seconds the system should activate automatically (in the event they are knocked-out). Also, I’m not sure if the inflated bladder on the back pushes the surfer forwards – that would be unfortunate in the event the surfer passed-out.
I’m not a big wave surfer, but I’ve had a few hold-downs in hurricane swells and it sucks. During Hurricane Earl the swell got freaky and very large just as I paddled out and I was under for nearly 2 waves. For anyone held-down like that you know how scary it is and it makes you wonder – if only for a fleeting moment – why you’re out there to begin with.
Check out the video and if you’re charging large surf, do yourself and your loved ones a favor and consider buying the Billabong V1.
Posted by: Lawrence


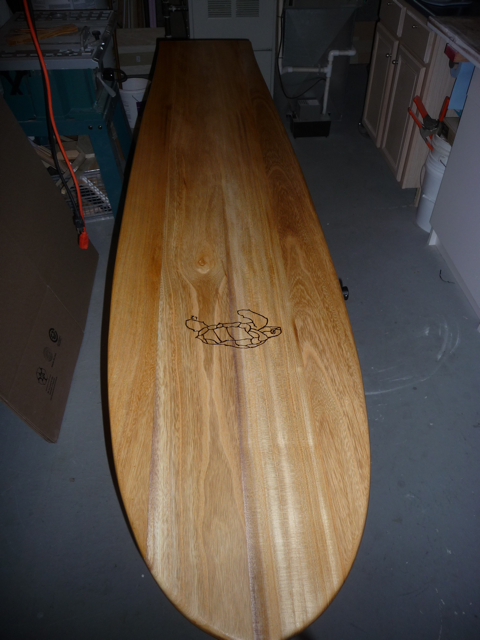


 Between sick kids, work, travel, snowboarding, sick me, sick wife, dog sitting, freelance, guitar lessons, shoveling snow and just about any excuse I can conjure… well, I took my sweet time. No challenge really since I don’t have a winter suit and looking at a finished board for months will be torture. But by working slowly I was methodical, careful and well researched. I think I made a pretty sick Alaia, I’ll know when I ride it in late April (most likely).
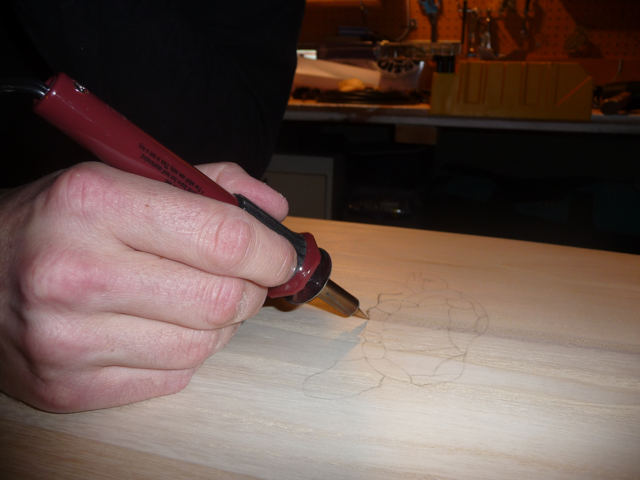
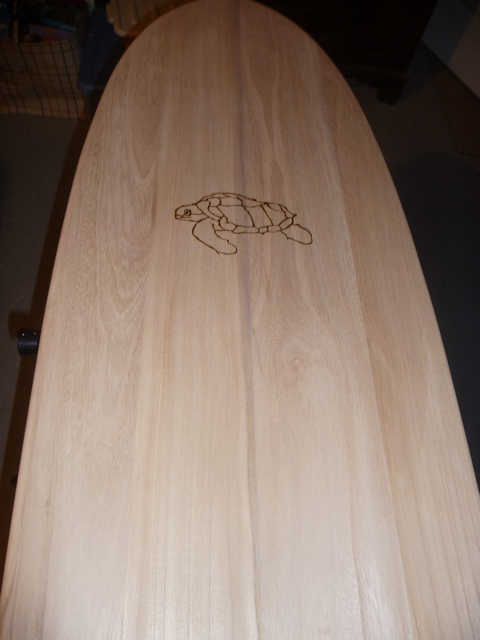
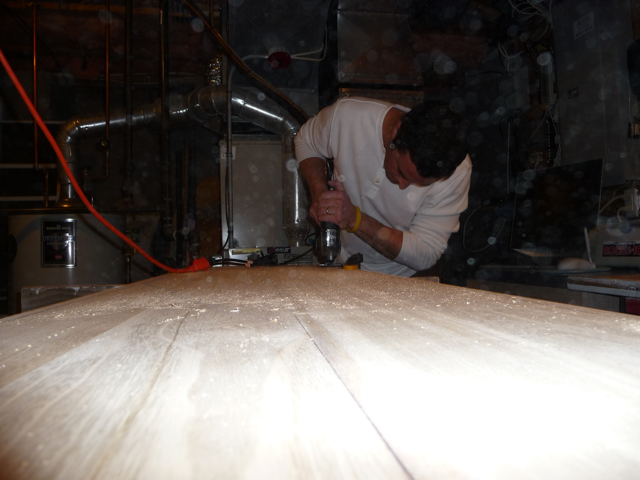
 There’s still no oil on it yet (waiting to wood-burn a turtle on it), but I sanded to 400 grit and it already feels smooth as silk. I will definitely build another one of these and I think if I could do anything differently, it would be to do the entire project outdoors. The time to clean up the dust was almost as long as the time spent building the board! Between a tack clothe, shop vac, compressed air and elbow grease, I finally have a proper, dirty basement workshop again.
 Once I burn the turtle graphic and apply the oil I’ll wrap-up the series of building posts by posting some final pictures. At some point in the spring when I can venture out in my 4/3, I’ll post an update on how it was to ride. For now it’s a conversation piece that beckons me. Hamish in Australia, who has been following this project, has his Alaia finished and has already and had a session with his mates. Hamish says “the trick is to paddle really hard, not let the tail swing around from underneath you” and he also reports it is very fast.
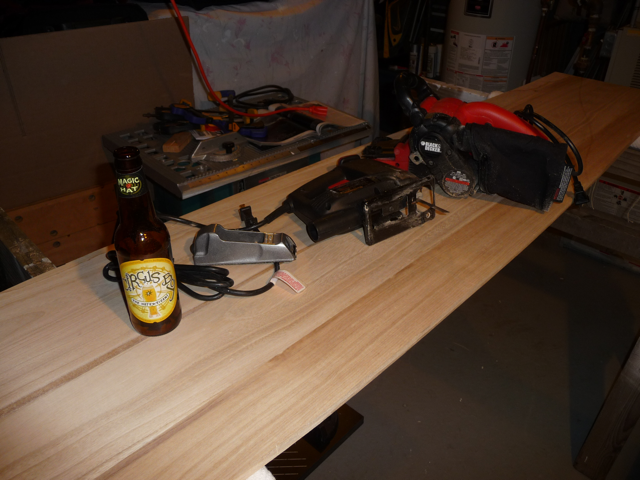


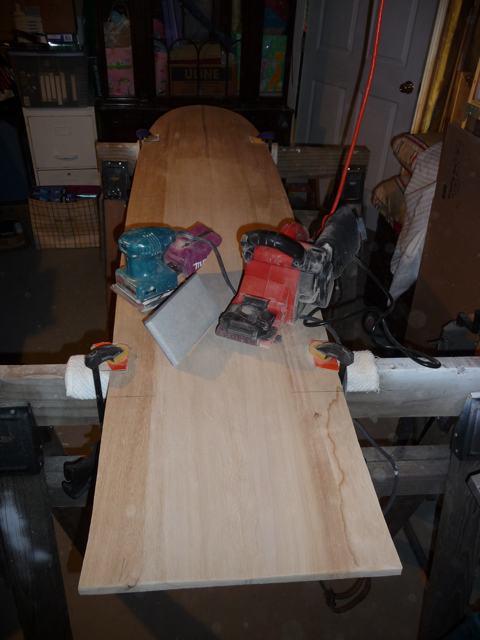
 Significant progress this weekend with the Alaia project. I cut the board to shape with a jigsaw, working in one direction. I said in the previous post that I wouldn’t cut the Stuth tail, but I had a change of heart. I like the side-cut it creates and given my 24 years of snowboarding I’m drawn to that shape (yeah, I’m that old and have boarded that long!).
  Once I was satisfied with the shape, I used a pocket plane to put a 1/4″ bevel on the top edge (you can apply very light pressure since the Paulownia wood is so soft). Holding the plane at 45° and moving in one direction, I cut until Jon’s marks were no longer visible. After inspecting and small tweaks I flipped the board and transferred the center line which I’ll use to create the concave. I also transferred 3 perpendicular markings from the top of the board at 12″, 40.5″ and 70″ from the nose. I believe these marks were used to create the shape, but it can’t hurt to have them on the bottom.
 These are the tools I used for this phase (a special thank you to
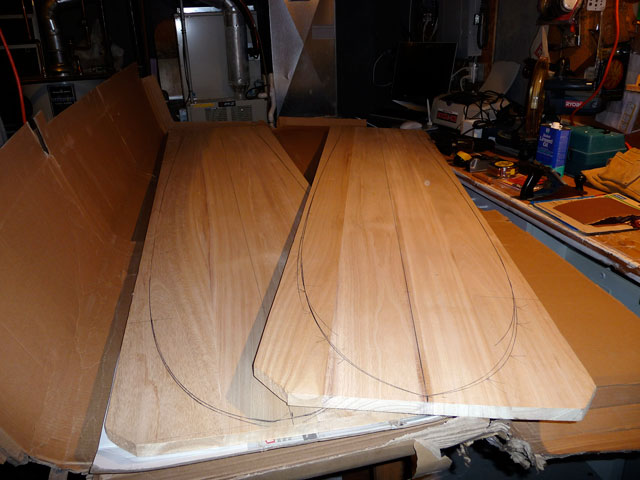
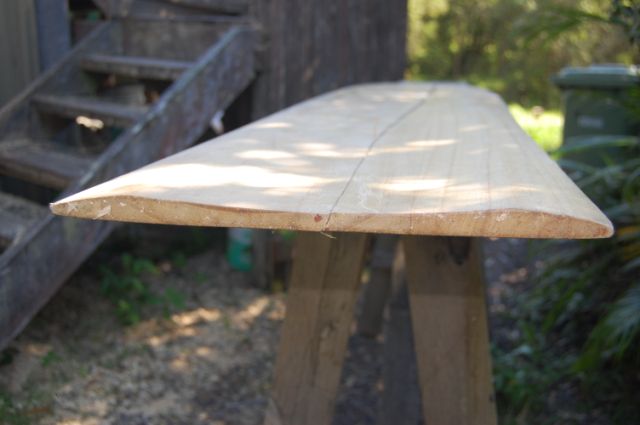

 When completed, the Finley should have, according to Wegener Surfboard’s model description, “a light roll on the deck and a concave running from the nose all the way to the tail. The concave is 3/8” deep.” (Note: Jon recommended I keep more material on the board and stay within 1/4″) “This really helps keep the board from sliding sideways too much and gives the board more traction in the face.